Engage Affiliate User Guide

Affiliate Admin Login
Figure 1.1
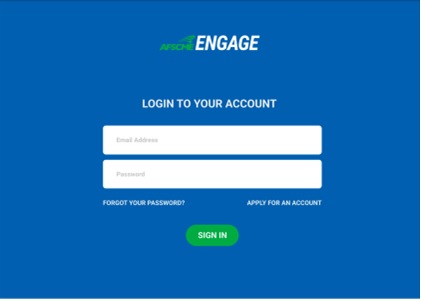
- To create an AFSCME Engage account, you will need to press the ‘Apply For An Account’ button (shown in Figure 1.1, bottom right)
Figure 1.2

- Fill out the registration form (shown in Figure 1.2) and await the approval f rom AFSCME Engage System Administrator.
- Once your pending request for an account is approved, you will receive an email to the specified email address with a link to complete your registration by creating your password (shown below in Figure 1.3).
Figure 1.3

- Once completed you will return back to the login screen (Figure A),
fill out the form with the email address and newly created password.
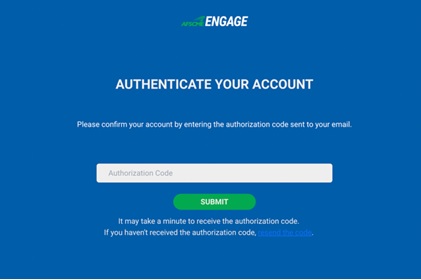
- You will be sent an authentication code to enter to securely login ( shown below in Figure 1.4)
Figure 1.4
- If you ever forget your password, press the ‘Forgot Password’ button on the
login screen (Figure 1.1)
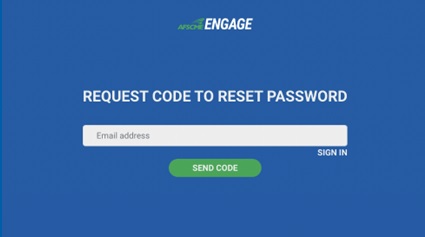
- You will be asked to enter your account email, so that a code will be sent to reset your password (shown below in Figure 1.5)
Figure 1.5
Affiliate Admin Calendar
Figure 2.1
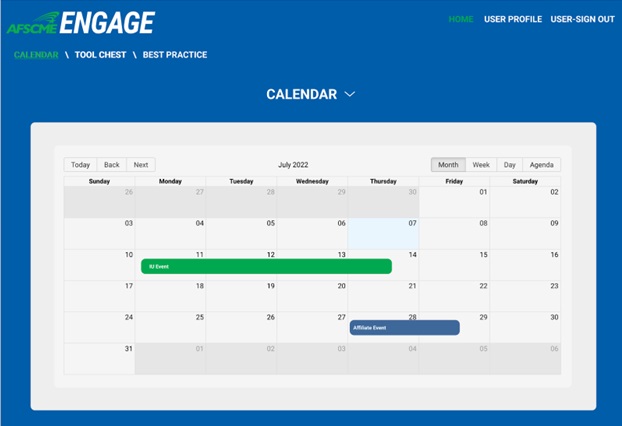
- Once logged in, you will be brought to the Calendar (shown in Figure 2.1)
- IU events will be color coded as green
- Any and all Affiliate Group events will be color coded as blue
- To add an event to the calendar, press the drop down arrow to the right of the
Calendar title, and press ‘Add Calendar Event’
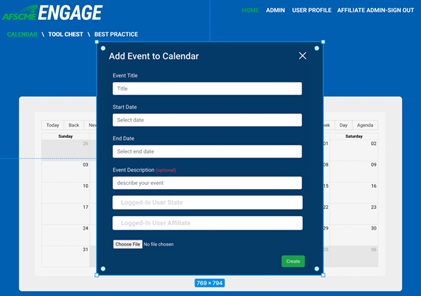
- Fill out Add Calendar Event form with event details (shown in Figure 2.2)
- Press the ‘Create’ button at the bottom of the form to finalize event
Figure 2.2
- To view or change details of an calendar event, simply click on the desired
event to open (shown below in Figure 2.3)
- NOTE: You will only be able to edit calendar events of your Affiliate Group
- Once opened, to change event details select which event detail needs to be changed and be sure to press the Update Button at the bottom of the pop up.
Figure 2.3

Affiliate Admin Tool Chest
Figure 3.1
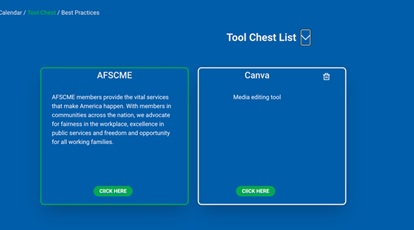
- On the Tool Chest page you will see all tool chest links displayed
- IU Tool Chest Links will have green border, and affiliate links will have a white border
- To view a Tool Chest link, click the ‘Click Here’ button, and the link will display in a new tab
- To delete a Tool Chest link, click the trash icon to the right of the specified
Tool Chest link item.
- NOTE: You will only be able to delete your affiliate group’s links
- To add a tool chest link, press the drop down arrow to the right of the Tool Chest List title and press ‘Add Tool Chest Link’
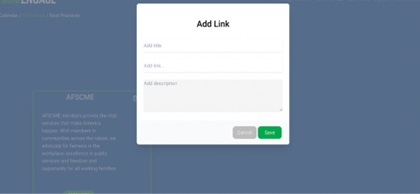
- Fill out Add Tool Chest Link form with link information (shown below in Figure 3.2)
- Press the ‘Save’ button to finalize your link, or press the ‘Cancel’ button to cancel
Figure 3.2
Affiliate Admin Best Practices
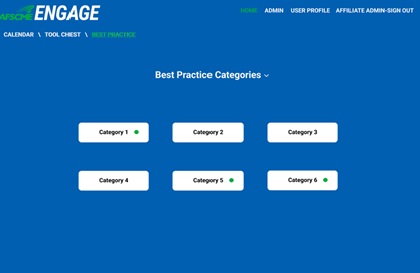
- On the Best Practices page, you will find all categories for Best Practices
- IU categories will be marked by a green dot (shown below in Figure 4.1)
- To see articles related to the category, click on specified category button
Figure 4.1
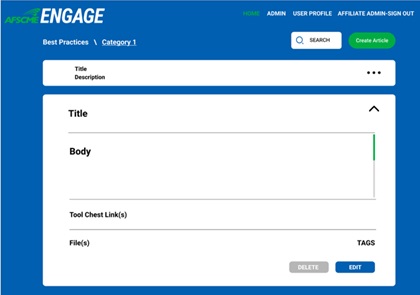
- Once inside the desire category, you will see a list of all the articles pertaining
to that specific category
- To see the contents of an article, press the option icon to the right of the article title to expand (shown below in Figure 4.2)
- To Edit an article, press the ‘Edit’ button at bottom of the expanded article, press the ‘Delete’ button to delete
- To contract an expanded article, press the up arrow at the top of the expanded article
- To add a new article, press the green ‘Add New Article’ button at the top of the article list (shown in Figure 4.2)
- You are able to search for a specific article in a category using the search bar
located above the article list and next to ‘Add New Article’ button
- The search is used by searching keywords related to the tags specified in the creation of an article (shown in the form in Figure 4.4)
Figure 4.2
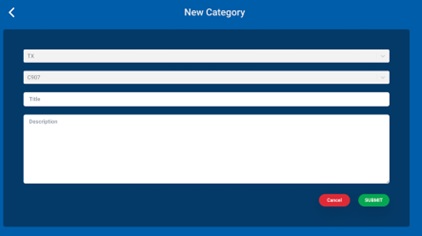
- To add a new Best Practice category, press the drop down arrow to the right of the
Best Practice Categories title and press ‘Create New Category’
- NOTE: You will only be able to create categories for your Affiliate Group
- Fill out the New Category form (shown below in Figure 4.3)
- Press the ‘Submit’ button to finalize, press the ‘Cancel’ button to cancel
Figure 4.3
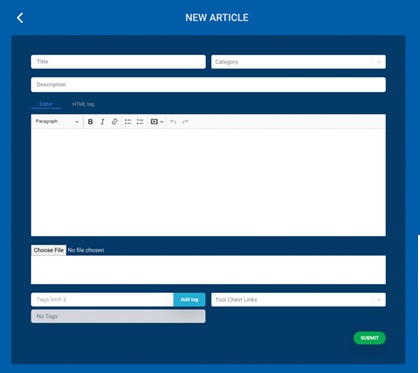
- To add a new Best Practice Article, press the drop down arrow to the right of
the Best Practice Categories title and press ‘Create New Article’
- NOTE: You will only be able to create articles under your Affiliate Group’s categories
- Fill out the New Article form (shown below in Figure 4.4)
- Press the ‘Submit’ button at the bottom to finalize, press the back arrow at the top of the form to cancel
Figure 4.4
Affiliate Admin
- The Admin Portal is split into two sections, Pending User Request on top and User
List on the bottom (shown below in Figure 5.1)
- NOTE: The pending request and users in the User List are for your Affiliate Group only
Figure 5.1
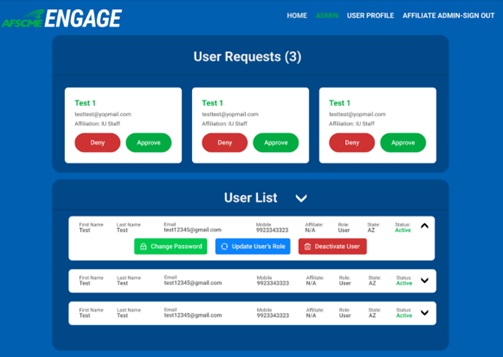
- For users requesting an Engage account, their pending request will show up in User Request
- Press the green ‘Approve’ button to approve, press the red ‘Deny’ button to deny request (shown in Figure 5.1)
- If no pending request, the User Request count (next to title) will read 0.
- The User List contains all the active users in the Engage Tool, press the dropdown arrow to the right of the User List title
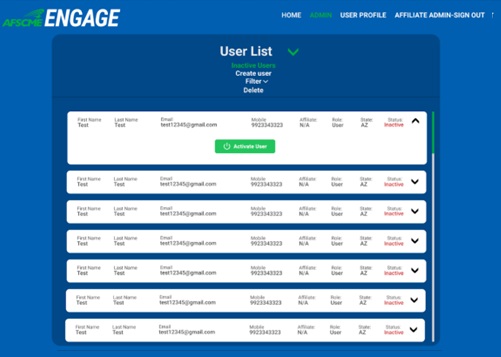
- Inactive User will show all users who were previously Engage Tool account holder, but are no longer active
- Any inactive user can be reactivated by pressing the dropdown arrow to the right of the User item and pressing the ‘Activate User’ (shown below in Figure 5.2)
Figure 5.2
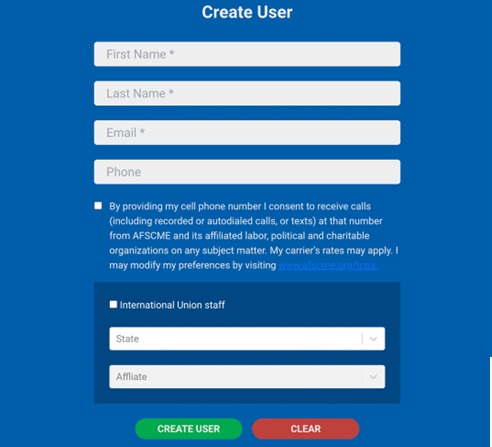
- The Create User option will allow you to create a Engage Tool user account (shown in Figure 5.3)
Figure 5.3
- To search for a specific user, or set of users - use the filter option or search bar (shown below in Figure 5.4)
Figure 5.4
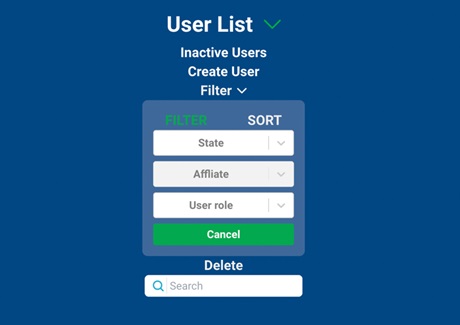
- To delete a user(s), select the Delete option
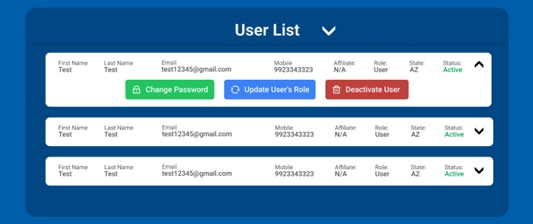
- All active users are in the User List
- User’s info are displayed as in Figure 5.5 Below
- Press the dropdown arrow to view user action options (shown below in Figure 5.5)
- The ‘Reset Password’ button sends a link to the user’s email to reset their password
- The ‘Update Role’ button opens a pop up that will allow you to change a user’s Engage Tool role
- The ‘Deactivate’ button deactivates the selected user
Figure 5.5
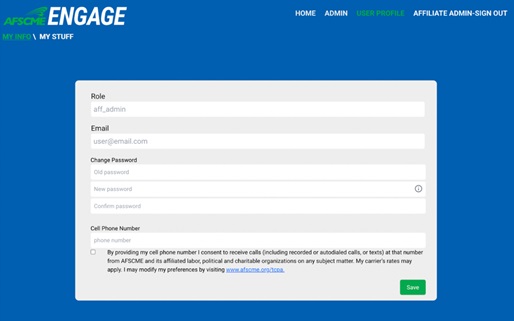
Affiliate Admin My Profile
- In the My Profile section, you will see your information (shown below in Figure 6.1)
- You are able to change your password in the ‘Change Password’ field
- You are able to change your phone number in the ‘Phone Number’ field
- Press the ‘Save’ button to finalize
Figure 6.1
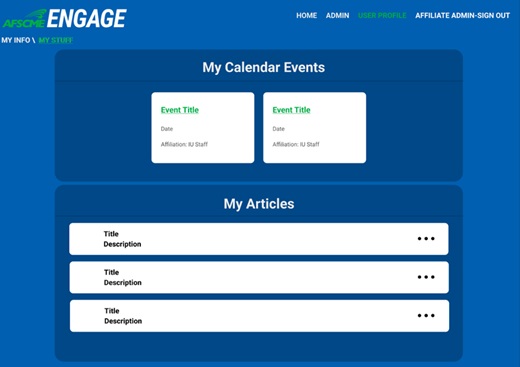
- Your created Engage Tool Events and Articles can be found in the My Stuff
section (shown below in FIgure 6.2)
- Your events can be viewed in the top section of My Stuff
- Your articles can be viewed and edited in the bottom section of My Stuff (refer back to Engage Tool Best Practices #2 for article editing)
Figure 6.2